
A study area often accumulates a distinct kind of clutter: highlighters that roll behind books, notebooks piled without order, cables strewn across the desk, sticky notes plastered on the monitor. Installing a pegboard does more than tidy the wall — it assigns a place for each item, making the entire room feel calmer and more productive before you even begin a study session.
For students, an orderly environment directly influences focus and the flow of work. You don’t need an expensive setup or complicated systems to get there. A simple pegboard installed in an afternoon can manage the items that accumulate around a desk over a semester, keeping essentials accessible and visible.
Organization at Every Level
Think about your study area in layers. The desk surface is for what you’re actively using. Drawers and shelves store regularly needed items that aren’t in constant use. The wall should hold what you need to see and grab at a glance — that’s where a pegboard shines.
The same layered approach applies to managing writing and assignments. A clear physical environment makes it easier to sit down and concentrate, but writing tasks also benefit from structure. When a deadline still feels heavy, having both a tidy space and a reliable plan or model for your work reduces stress and jumpstarts productivity. These two levels — physical organization and the structure of your work — support one another more than most people expect.
Choosing the Right Pegboard
Pegboard usually comes in two thicknesses: 1/8-inch and 1/4-inch. The thinner board is fine for lightweight items like small notebooks and pens. For heavier tools or a system that will last for years, 1/4-inch hardboard with matching holes is a better choice. It accepts both thinner and thicker hooks, increasing flexibility for what you can hang.
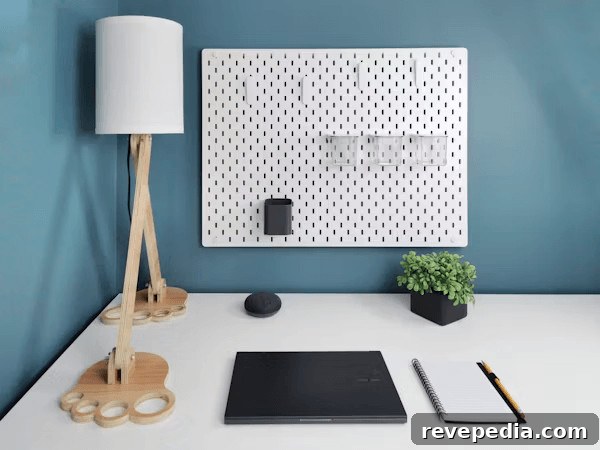
Metal and plastic pegboards are alternatives. Metal provides a sleek, durable finish, while plastic panels often interconnect for larger wall configurations. For most student rooms or small study areas, standard 1/4-inch hardboard tends to be the most practical and affordable option.
Installation Basics
Pegboard requires about half an inch of clearance behind it so hooks can be inserted. The most dependable method is to mount 1×3 furring strips horizontally across the wall — one at the top, one at the bottom, and spaced every 16 to 24 inches in between. The pegboard is fastened to these strips rather than directly to the wall, ensuring stability and the necessary standoff for hooks.
A few practical tips before you begin:
- Use washer-head screws instead of standard screws — the wider head gives a stronger hold against the board
- Add a center support strip on panels wider than three feet to prevent bowing
- Paint the board before installation: apply a coat of primer and finish with semigloss paint to make cleaning easier; paint the board flat to avoid drips into the holes
- Use light coats of paint — thick layers can clog the peg holes
What to Hang and How
Standard hooks are ideal for scissors, rulers, and headphone cables. Wire baskets that clip onto the board keep loose items like index cards, pens, and small stationery organized. A short length of PVC pipe slipped over a long hook makes an effective pencil or marker holder. Small shelves built from plywood with 1/4-inch holes in the back can slide onto L-hooks and hold a calculator, a compact speaker, or a stack of sticky notes.
A common annoyance is hooks coming loose when you remove an item. A simple remedy is to apply a small dot of hot-melt glue to the lower leg of the hook before inserting it. The glue holds during use but can be removed with a firm pull when you want to rearrange the layout.
A Few Things Worth Keeping at Eye Level
Keep your most-used study items within easy reach: a pen, a highlighter, headphones, and your time-tracking tool should be at arm height in front of you. Items used less often can be placed above, below, or to the sides so the space in front of you stays clear and functional.
Organizing by Study Zone
Pegboard works best when arranged around how you personally study. Group related items together so the board is intuitive to use: if you always grab highlighters and your planner together, place both in the same area. Organizing by activity reduces the time spent searching for tools and keeps momentum steady during study sessions.
Add a Small Whiteboard or Corkboard Panel
A whiteboard panel mounted on the pegboard with hook clips is a highly useful addition. Use it for weekly priorities, key terms to review, or visible deadlines. It occupies no desk space and keeps important reminders in sight while you work.
Keeping It Flexible
The strength of pegboard over permanent shelving is its adaptability. As a semester progresses and needs change, the board can be rearranged to match. A hook that held a charging cable in September might hold reference cards in November.
Make it a habit to reassess the board at the start of each term: remove what’s no longer needed, add items for the new semester, and freshen the board if it has taken on marks. Treating your pegboard as a living system rather than a one-time installation keeps it useful for as long as you use the study space.
Rotate Materials by Subject
When juggling multiple subjects, dedicate a section of the board to whatever you’re focusing on that week. Move flashcards, reference sheets, and color-coded pens forward while a subject is active, then shift them aside when it’s not. This keeps the board relevant without requiring a complete reorganization every time your focus changes.
Final Thoughts
Clutter builds up in study spaces because surfaces lack a system — items land where there’s room rather than where they belong. A well-planned pegboard gives each object a designated place, making setup and cleanup faster and reducing friction before and after study sessions. The initial installation takes an afternoon, but the organizational benefits last for years, helping students stay focused and productive.